

OEM Angiographic Control Syringe Options That Improve Contrast Delivery
2026-09-06
Angiographic procedures demand more from a control syringe than simply moving contrast. Small variations in pressure, flow, and tactile feedback can alter image quality and patient safety. That’s why interventional teams are taking a closer look at OEM angiographic control syringe options designed specifically to improve contrast delivery. Among the names gaining traction, INT stands out for its focus on consistent, low-resistance operation and compatibility across cath lab setups. In this post, we’ll explore what separates a reliable OEM control syringe from generic alternatives, and how the right choice can sharpen your imaging without adding complexity.
Hand Fatigue Is a Contrast Delivery Problem, Not Just Comfort
Every manual injection of contrast media places a unique strain on the hand and forearm, yet most discussions reduce this to a generic complaint about workstation ergonomics. The real issue is mechanical: high-viscosity contrast agents demand sustained pressure through a syringe, often at flow rates that force the operator to fight against resistance for 30 seconds or more. Repeated over dozens of patients a day, the accumulated stress on the flexor tendons and intrinsic muscles of the hand is not a comfort inconvenience—it is a repetitive strain injury waiting to happen.
The problem lies in the mismatch between human biomechanics and the physical properties of modern contrast formulations. Contrast agents have become denser and more viscous over the years to improve image quality, but the delivery method has lagged. A standard syringe requires a grip strength that varies with injection speed and catheter resistance, and when the operator must maintain a steady rate for optimal vascular opacification, the hand becomes a pressure regulator under constant load. Fatigue then leads to micro-adjustments, tremor, and inconsistent flow—directly impacting image quality and patient safety.
Reframing hand fatigue as a contrast delivery problem shifts the solution away from padded grips and wrist rests. The answer lies in automating the force application, whether through power injectors calibrated to patient-specific parameters or through ergonomic syringe designs that reduce the mechanical advantage required from the human hand. Until contrast delivery is treated as an engineering challenge rather than a comfort afterthought, hand fatigue will remain an unavoidable occupational hazard for imaging professionals.
Plunger Seals That Hold Pressure Without Sticking
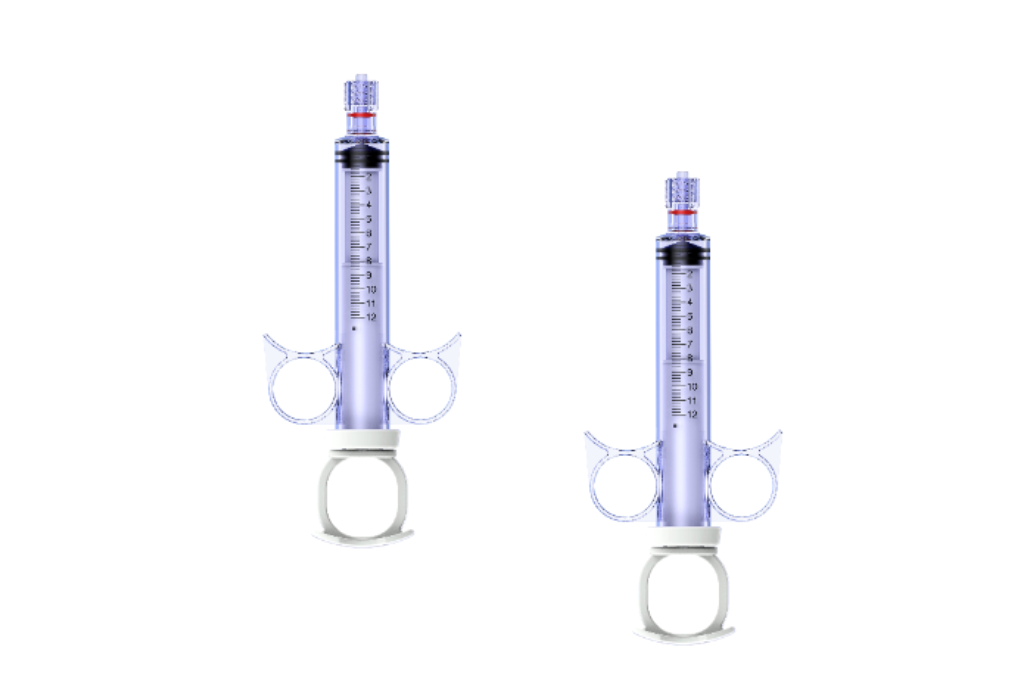
Achieving a reliable seal in plunger applications often means walking a fine line between holding pressure and avoiding excessive friction. The right seal geometry, combined with careful material selection, can prevent sticking even under high differential pressures. Instead of relying on heavy interference fits that create drag, modern designs lean toward controlled contact profiles and carefully tuned lip angles. This approach allows the seal to respond quickly to pressure changes without the plunger hanging up during reciprocation.
One practical trick is to incorporate a slight micro-texture or a non-uniform contact pattern on the sealing lip. This breaks the fluid film just enough to prevent full hydrodynamic lift, yet avoids the dry contact that leads to stick-slip. Materials like filled PTFE or specialized polyurethane blends offer lower breakaway friction, especially when paired with a polished plunger surface. The result is a seal that can hold thousands of PSI while still letting the plunger start moving with minimal force.
Maintenance conditions also matter more than many realize. Contaminants trapped in the seal groove can cause uneven deformation, leading to high local friction and eventual stiction. Regular flushing of the sealing area, along with proper groove tolerances, keeps the seal working as intended. Ultimately, a plunger seal that holds pressure without sticking is less about a single magic material and more about matching the seal profile, surface finish, and operating conditions to the specific duty cycle.
Dead Space in the Syringe Tip: Small Change, Big Waste Difference
Dead space is the small volume of fluid that stays trapped inside the syringe tip and needle hub after the plunger has been pushed all the way down. In a standard syringe, this leftover amount might look negligible—a few hundredths of a milliliter—but it repeats with every single injection. Low dead space (LDS) syringes narrow that cavity, squeezing out more of the dose that would otherwise be thrown away.
Across a vaccination campaign or a hospital pharmacy, the math turns ugly fast. If a clinic discards 0.05 mL per shot and gives 200 injections a day, that is roughly 10 mL of usable drug lost daily. For expensive biologics or multi-dose vial shortages, those small losses add up to real money and missed doses. Reducing dead space is not about changing technique; it is about choosing a better tool.
The shift to low dead space designs often requires no extra training and no new workflow. It is a behind-the-scenes change that quietly stretches supply, cuts waste, and makes every vial go further. Sometimes the smallest geometry in a device has the largest operational impact.
How Barrel Wall Transparency Affects Bubble Detection Speed
The relationship between barrel wall transparency and bubble detection speed is rarely a simple on/off condition. A completely transparent barrel allows optical sensors or cameras to see bubbles as soon as they enter the field of view, but the effective detection speed depends on how cleanly the wall transmits light without scattering or refracting it unpredictably. Even minor haze or micro-scratches on the inner surface can diffuse the light path, making small bubbles appear fuzzy and forcing the detection algorithm to spend extra cycles confirming whether the feature is actually a bubble or just an optical artifact.
Wall thickness adds another layer of influence. Thicker transparent walls tend to increase optical distortion near the edges of the barrel, where bubbles often travel due to fluid dynamics. If the detection system has to compensate for barrel curvature and edge distortion in real time, every frame takes longer to process. On the other hand, ultra-thin walls may transmit light more directly but can also flex under pressure, changing the local refractive geometry during operation and causing intermittent false negatives that require re-scanning.
Material choice also shapes speed through its refractive index and surface finish quality. Polycarbonate and glass, for example, behave differently under backlighting: glass offers lower distortion but is heavier and more prone to breakage, while polycarbonate may introduce slight birefringence that confuses polarized-light detectors. In practice, the fastest bubble detection occurs when the barrel wall is not only transparent but also optically uniform enough that the detection algorithm can use a simple threshold rather than complex image correction. A small investment in polishing the inner wall and reducing wall thickness variation often yields a larger improvement in detection speed than upgrading the camera resolution.
Pressure Ratings Hidden in Hub Design
A hub rarely carries its pressure rating on a visible tag. Instead, the number is baked into the casting itself. Look at the flange thickness near the bolt circle, the way ribs taper into the center bore, and how the fillets around each mounting pad flow without sharp corners. These aren't stylistic choices—they're stress-management decisions left by engineers who knew exactly what the part would endure.
Bolt spacing tells more than most people realize. A tighter pattern with smaller fasteners often points to a lower pressure class, while wider spacing and heavier studs suggest the housing was designed to resist internal force trying to push the two halves apart. The depth of the counterbore around each hole, the presence of a machined step on the pilot diameter, even the roughness of the raw casting inside the port area—each detail narrows the possible rating range.
Some clues only show up after you've handled a few dozen failed or retired parts. Compare the wall section behind a threaded port to the same area on a known low-pressure hub and the difference becomes obvious. The material's grain flow near the flange face, the subtle thickening around the shaft bore, or an extra web between adjacent bolt bosses can shift a part from 1500 psi territory to 3000 psi without a single stamped number.
OEM Syringe Calibration and Its Effect on Contrast Viscosity
OEM syringe calibration is often treated as a routine maintenance step, but its role in contrast delivery goes beyond simple volume accuracy. When a syringe is calibrated to match the injector’s programmed flow rate, it maintains a consistent shear environment inside the tubing and catheter. Any deviation in calibration shifts the actual delivery speed, which directly alters the shear rate experienced by the contrast agent as it moves through narrow pathways.
Most iodinated contrast media are non-Newtonian fluids, meaning their apparent viscosity changes with shear rate. A syringe that is slightly out of calibration and delivers contrast at a lower flow than intended reduces the shear forces, allowing the fluid to retain a higher effective viscosity. That increase in resistance can raise injection pressure, disrupt the intended bolus profile, and even lead to incomplete opacification in timing-sensitive studies.
In clinical practice, skipping regular OEM calibration checks may introduce errors that are not immediately visible on the console. The injector may report the programmed flow, while the actual delivered rate drifts enough to change contrast behaviour in the line. Over time, this subtle mismatch can degrade image enhancement consistency, making it harder to compare studies or reproduce protocols across different machines and operators.
FAQ
It comes down to how smoothly the plunger moves under pressure and how precisely you can meter the contrast. A well-designed syringe minimizes hand fatigue and gives you tactile feedback, so the injection feels consistent from start to finish.
Some designs integrate a locking mechanism or a softer stop that prevents sudden high-pressure spikes. By controlling the flow rate more evenly, these syringes help avoid the pressure surges that often lead to reflux at the catheter tip.
The barrel needs to withstand pressures without flexing. Polycarbonate or similar high-clarity polymers offer the right balance of rigidity and visibility. If the barrel flexes even slightly, you lose that direct one-to-one transfer of hand force to contrast flow, which can make timing unpredictable.
Lower dead-space designs are available that waste less contrast and provide finer control at low flow rates. For smaller anatomies, being able to deliver one or two milliliters smoothly without stiction is often the difference between a clean injection and a messy one.
A lot. A well-seated, slightly compressible tip maintains a seal without sticking. If the tip is too hard, it can skip or chatter during slow injections; if too soft, it may deform and cause leakage. The best OEM options use a multi-durometer design that adapts to the barrel wall.
Look for syringes with a low-profile finger grip and a shorter throw. This lets you keep your wrist in a neutral position and use larger muscle groups for control, rather than relying on fine finger movements. That stability translates directly into better flow uniformity.
Critical. Some OEM syringes are designed as drop-in replacements for popular injection systems, but you need to verify the pressure rating and luer lock geometry. A mismatch might work initially but can cause leaks or failure at high pressure, which is the last thing you want mid-procedure.
Look for a manufacturer that offers customization of the plunger feel, barrel markings, and dead space without requiring huge order volumes. Also check if they provide validation testing data for pressure and leakage. A good partner will let you tweak the design to match your specific injector platform rather than forcing you to adapt to an off-the-shelf part.
Conclusion
In many angiography suites, contrast delivery inconsistencies get blamed on injector settings, yet the control syringe itself often introduces hidden variables. Hand fatigue is one of the most underrated ones; when clinicians struggle to maintain steady pressure over long procedures, flow rates drift and image timing suffers. Choosing an OEM syringe with a lighter, more balanced plunger force reduces that variability. Equally important are plunger seals engineered to hold pressure without sticking. A seal that grips too tightly causes jerky starts and stops, while one that leaks undermines injection accuracy. The best designs pair low static friction with reliable high-pressure containment, so every push translates directly into intended contrast flow.
Small geometry choices matter more than they appear. Dead space in the syringe tip can waste several milliliters of contrast per case, adding cost and complicating disposal. An OEM option with a low dead-space tip and a precise luer interface not only conserves contrast but also improves bolus timing. Barrel wall transparency is another practical factor; higher clarity resins let clinicians spot microbubbles faster, which is critical before injections. Hub design carries pressure ratings that are easy to overlook—sturdier, better-seated hubs prevent blow-offs under rapid injection. Finally, OEM syringe calibration tuned to contrast viscosity helps maintain consistent flow across temperature and concentration shifts. Together these details turn a commodity syringe into a genuine delivery control device.
Contact Us
Contact Person: Jeffrey
Email: [email protected]
Tel/WhatsApp: 86-0633-2230056
Website: https://www.sd-intmedical.com