

Top 19 Inch System Integration Cabinet Features You Need to Know
2026-09-09
Most datasheets for 19-inch system integration cabinets look impressive until you’re standing in front of a rack with a hot spot and a missing cable entry. The features that actually matter rarely get the spotlight—until they fail. In this post, we skip the marketing fluff and walk through the top 19 cabinet characteristics you should verify before your next integration, including several that TPS has turned into standard practice.
Why 19-Inch Racks Still Rule Industrial Floors
The staying power of 19-inch racks has less to do with habit than with a quiet kind of engineering logic. Plant floors are already crowded with power supplies, controllers, and networking gear that follow the same mounting pattern. A replacement module from a different vendor still lines up with the existing rails, so swaps happen during a shift instead of over a weekend.
These cabinets also cope with conditions that would choke standard office equipment. Perforated doors, filtered intake fans, and deep cable channels have developed alongside the format over decades. Dust, vibration, and fluctuating temperatures become manageable problems rather than shutdown triggers, and the layout leaves enough room to trace a faulty wire without pulling half the panel apart.
Perhaps the overlooked advantage is how naturally the system scales. A single bay can grow into a full row without changing the basic footprint or fabricating custom brackets. When cooling demands rise or a new drive bank arrives, adding a side-mounted air conditioner or an extra swing frame takes hours, not a redesign. That blend of backward compatibility and physical tolerance is rare on an industrial floor.
Thermal Design Details That Prevent Midnight Failures
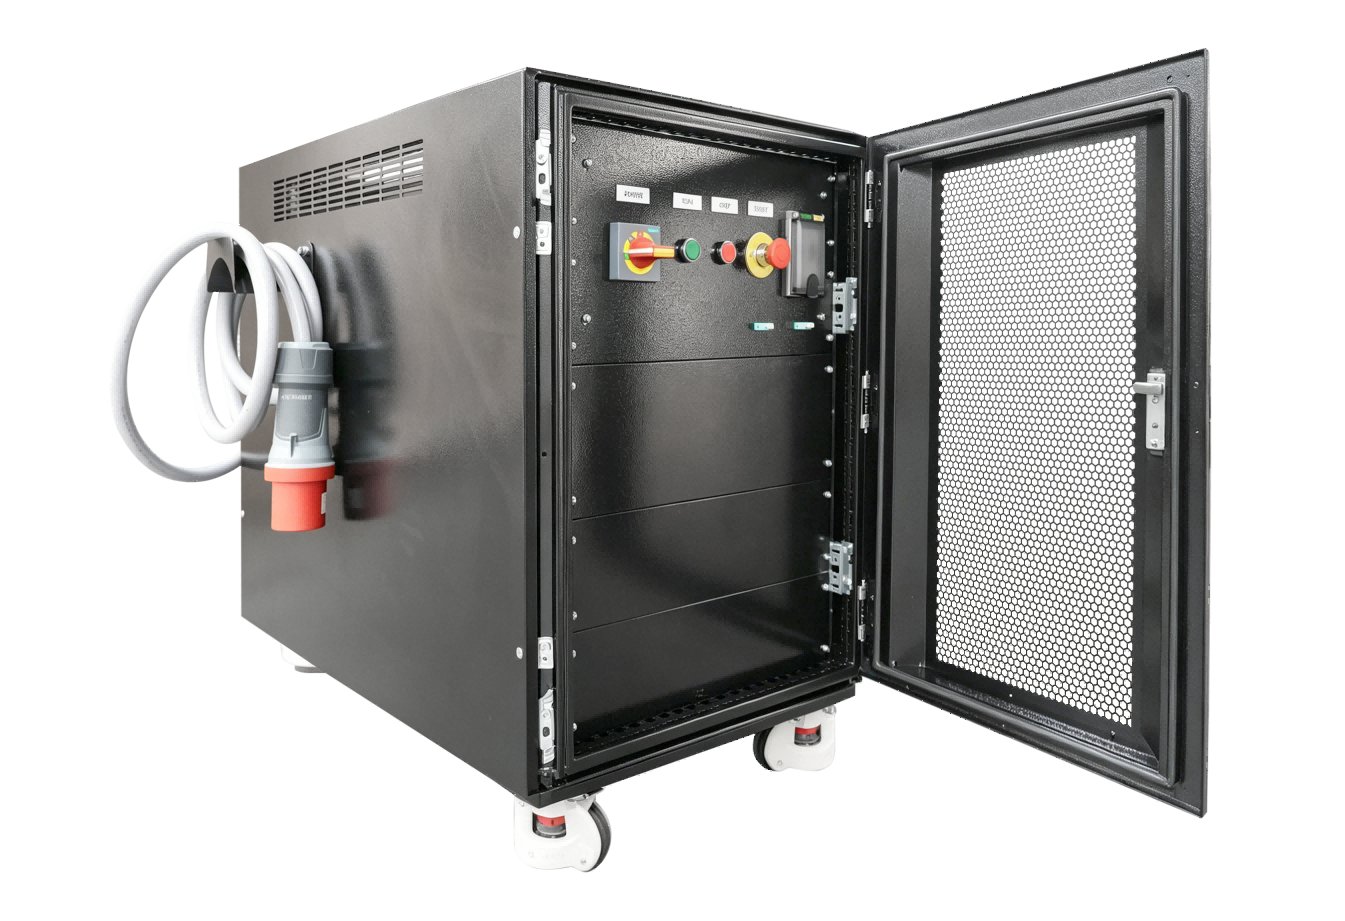
Most midnight breakdowns trace back to a handful of avoidable thermal oversights, and the first is component spacing. Power-hungry parts placed too close to each other create localized hotspots that remain invisible during short bench tests. A practical rule is to keep high-dissipation MOSFETs and regulators at least 15 mm apart, and never line them up in a row where each component preheats the next. If the board layout cannot accommodate that spacing, adding a small copper pour connected to the ground plane acts as a local heat spreader that drops junction temperature by several degrees without adding cost.
Another detail that pays off at 2 a.m. is the thermal via pattern under exposed pads. Four to six vias drilled to 0.3 mm and filled with solder wick heat away from the die far better than a solid pad alone, yet many designs skip this because it does not show up on the electrical schematic. Pair that with a thin, even layer of phase-change thermal interface material instead of generic silicone grease. Phase-change material softens at operating temperature and fills microscopic air gaps that would otherwise act as insulators. The result is a lower and more stable case-to-heatsink resistance over hundreds of thermal cycles.
Finally, treat airflow as a designed path rather than an afterthought. Place tall capacitors or connectors away from the intake side of heatsinks so they do not deflect the stream before it reaches the fins. If you rely on a fan, set the speed curve to ramp up before the heatsink becomes too hot to touch, not after the system has already throttled. These small layout and control choices do more to prevent a 3 a.m. service call than any single exotic material.
Cable Routing Choices Your Installers Will Thank You For
Plan the physical path before you pull a single foot of cable. Walk the route with your installers and mark every turn, drop point, and support location. Use open cable trays, ladder rack, or J-hooks where possible instead of bundling everything into a closed conduit. This makes changes easier and keeps heat from building up. When you do need to change direction, use gradual bends rather than hard 90-degree elbows—cable pulls become faster and you avoid kinking the conductors.
Keep power and data separated by at least a few inches, and cross them at right angles when they have to intersect. Use hook-and-loop strips instead of zip ties; they hold bundles firmly without crushing the jacket, and they can be reopened for future adds. Leave a service loop of a couple feet at each end and at intermediate pull boxes. That extra slack turns a minor retermination into a five-minute job instead of a repull.
Label both ends of every cable with the same identifier before you close up walls or ceilings. If a cable passes through a junction box or splice point, label it there as well. Keep a simple log—photos on a phone work fine—showing the actual route behind drywall and above the ceiling grid. Your installers will spend less time toning and tracing, and the next technician who opens the panel will know exactly what goes where.
Load Ratings and What They Actually Mean in Practice
Load ratings are often treated like a simple checkmark on a spec sheet, but that number hides a lot of nuance. In practice, the printed load index on a tire refers to the maximum weight it can carry at the speed and inflation pressure specified by the manufacturer. Running at lower pressures or higher speeds drastically cuts that capacity, even if the sidewall still says "1,500 pounds." I've seen trailers overloaded because owners assumed the rating was a fixed guarantee, then wondered why sidewalls cracked after a long hot highway run.
Another thing people miss is that load ratings assume even weight distribution and proper alignment. Put too much weight on one axle or corner, and the tire on that side gets pushed beyond its limit long before the total payload hits the rated number. Heat is the silent killer here: underinflation or overloading generates flex that builds temperature, and rubber loses strength as it heats up. So a tire rated for 1,600 pounds at 50 psi might effectively handle only 1,200 pounds on a scorching day if you're running 40 psi.
The practical takeaway? Don't just match the load rating to your gross vehicle weight. Leave a safety margin, check pressures cold before every trip, and reduce load when speeds or temperatures climb. Most failures I've come across weren't from a single massive overload but from constantly running at 95% of the rating in conditions the manufacturer never intended.
Material and Finish Options Beyond Boring Black Powder Coat
Black powder coat has long been the default for metal parts, but it rarely does justice to a well-designed product. The uniform matte black hides manufacturing marks and resists scratches, yet it also erases the subtle character of the underlying material. Designers are increasingly turning to finishes that let the metal speak—think bead-blasted titanium, machined aluminum with a clear anodized layer, or warm brass that develops a natural patina over time.
If you want something tougher than paint but more expressive than standard black, physical vapor deposition (PVD) coatings deliver rich metallic hues like graphite, bronze, and even iridescent blues, all with excellent abrasion resistance. Cerakote and other ceramic-based finishes offer a huge palette of matte colors—from olive drab to burnt orange—while still protecting against corrosion and impact. For a truly premium feel, hand-polished stainless steel or tumbled copper can give hardware a jewelry-like quality that black powder coat simply cannot match.
The right finish isn't just about looks; it also affects grip, heat dissipation, and long-term wear. Anodized aluminum, for example, provides a durable, non-conductive surface in colors that stay vivid for years. Brushed or satin textures hide fingerprints better than gloss black, and a clear conversion coating on magnesium or zinc can add protection without altering the metal's natural tone. By moving beyond the default black powder coat, you open up a world of tactile and visual variety that helps your products stand out in a crowded market.
How Modular Shelving Cuts Integration Time in Half
模块化搁架实现快速集成的核心在于其即插即用的设计理念。每个立柱、横梁和层板都经过预钻孔和预切割,安装时无需现场测量或切割,只需按照编号顺序拼接。一个典型的仓库安装中,传统方法需要三名工人在两天内完成布局和固定,而模块化系统让同样的团队在半天内就能将整个搁架单元竖立并调平。
集成时间减半的另一个关键因素是连接件的标准化。传统搁架通常依赖焊接或定制螺栓,而模块化搁架使用统一的卡扣式或燕尾式连接,这些连接件在出厂前就已完成公差校准。这意味着安装人员不需要反复调整垂直度和水平度,也不需要在现场处理因焊接变形导致的返工。实际项目中,仅连接环节就节省了约40%的工时。
模块化搁架还允许并行作业,从而将集成周期压缩一半以上。由于组件可以独立包装和运输,电气布线和地面标记等工作可以与搁架组装同步进行,而传统方法必须等搁架完全固定后才能开始其他专业施工。这种时间上的重叠直接反映在总进度上:一个原本需要两周的集成任务,现在通常只需五天即可交付验收。
FAQ
It follows the EIA-310 standard for rail width and mounting hole spacing, allowing seamless installation of servers, switches, and power units. Ordinary racks often lack adjustable depth rails and proper grounding points.
Depending on frame construction and steel thickness, you can find models rated for 1,000 to 2,000 pounds. Look for reinforced corner posts and a welded base if you plan to house batteries or heavy UPS units.
Cold-rolled steel with a powder-coated finish is the sweet spot. Aim for at least 1.2 mm thickness on the frame and side panels to resist flexing, corrosion, and scratches in busy environments.
Equipment depths vary widely, from shallow network switches to deep storage servers. Front-to-rear rail adjustment, typically from 22 to 40 inches, keeps everything properly supported and allows for rear cable clearance.
Perforated front and rear doors, combined with top-mounted fan panels, create a natural front-to-back airflow path. This prevents hot spots and extends the life of sensitive electronics without relying solely on room air conditioning.
Look for top and bottom cable entry knockouts, vertical finger ducts, and rear tie-down points. These keep power and data cables separated, reduce signal interference, and make maintenance far less frustrating.
Most cabinets come with keyed locks on the front and rear doors, and many add side panel locks. For higher security, you can find models with electronic access control or support for padlocks on the main latch.
A built-in grounding bus bar and anti-static powder coating give stray current and static a safe path to earth. This is especially important when housing networking gear that can be damaged by even small electrostatic discharges.
Conclusion
Industrial floors still lean on 19-inch racks because they solve a lot of problems at once. The standard width plays well with off-the-shelf servers, network gear, and power strips, so you're not fighting custom brackets. But what really keeps these cabinets alive overnight isn't just the form factor—it's how heat gets moved. Side-to-side airflow with blanking panels, vented front doors, and a fan tray that actually matches the load can stop a 2 a.m. thermal shutdown. If you skip that, you'll learn the hard way that "load rating" is not a decoration. It's the difference between rails that sag under battery weight and a cabinet that stays square when someone leans on it.
Cable routing tends to get ignored until the first service call, but wide side channels, rear vertical managers, and split brush openings turn a messy install into a clean one. Your installers will notice the difference immediately. Beyond the usual black powder coat, look for light gray interiors that improve visibility and stainless or zinc-plated options if the floor sees washdowns or corrosive air. And if you want integration time to drop, modular shelving with pre-punched mounting holes and slide-out trays means less drilling, fewer custom spacers, and half the assembly guesswork. Good cabinets don't just store equipment—they cut downtime and make future changes less painful.
Contact Us
Contact Person: Lily
Email: [email protected]
Tel/WhatsApp: +49 (0) 2161 49526-0
Website: https://tps-elektronik.com/en/